
How to Make a DIY Photography Studio Track-Lighting Suspension System Using Strut
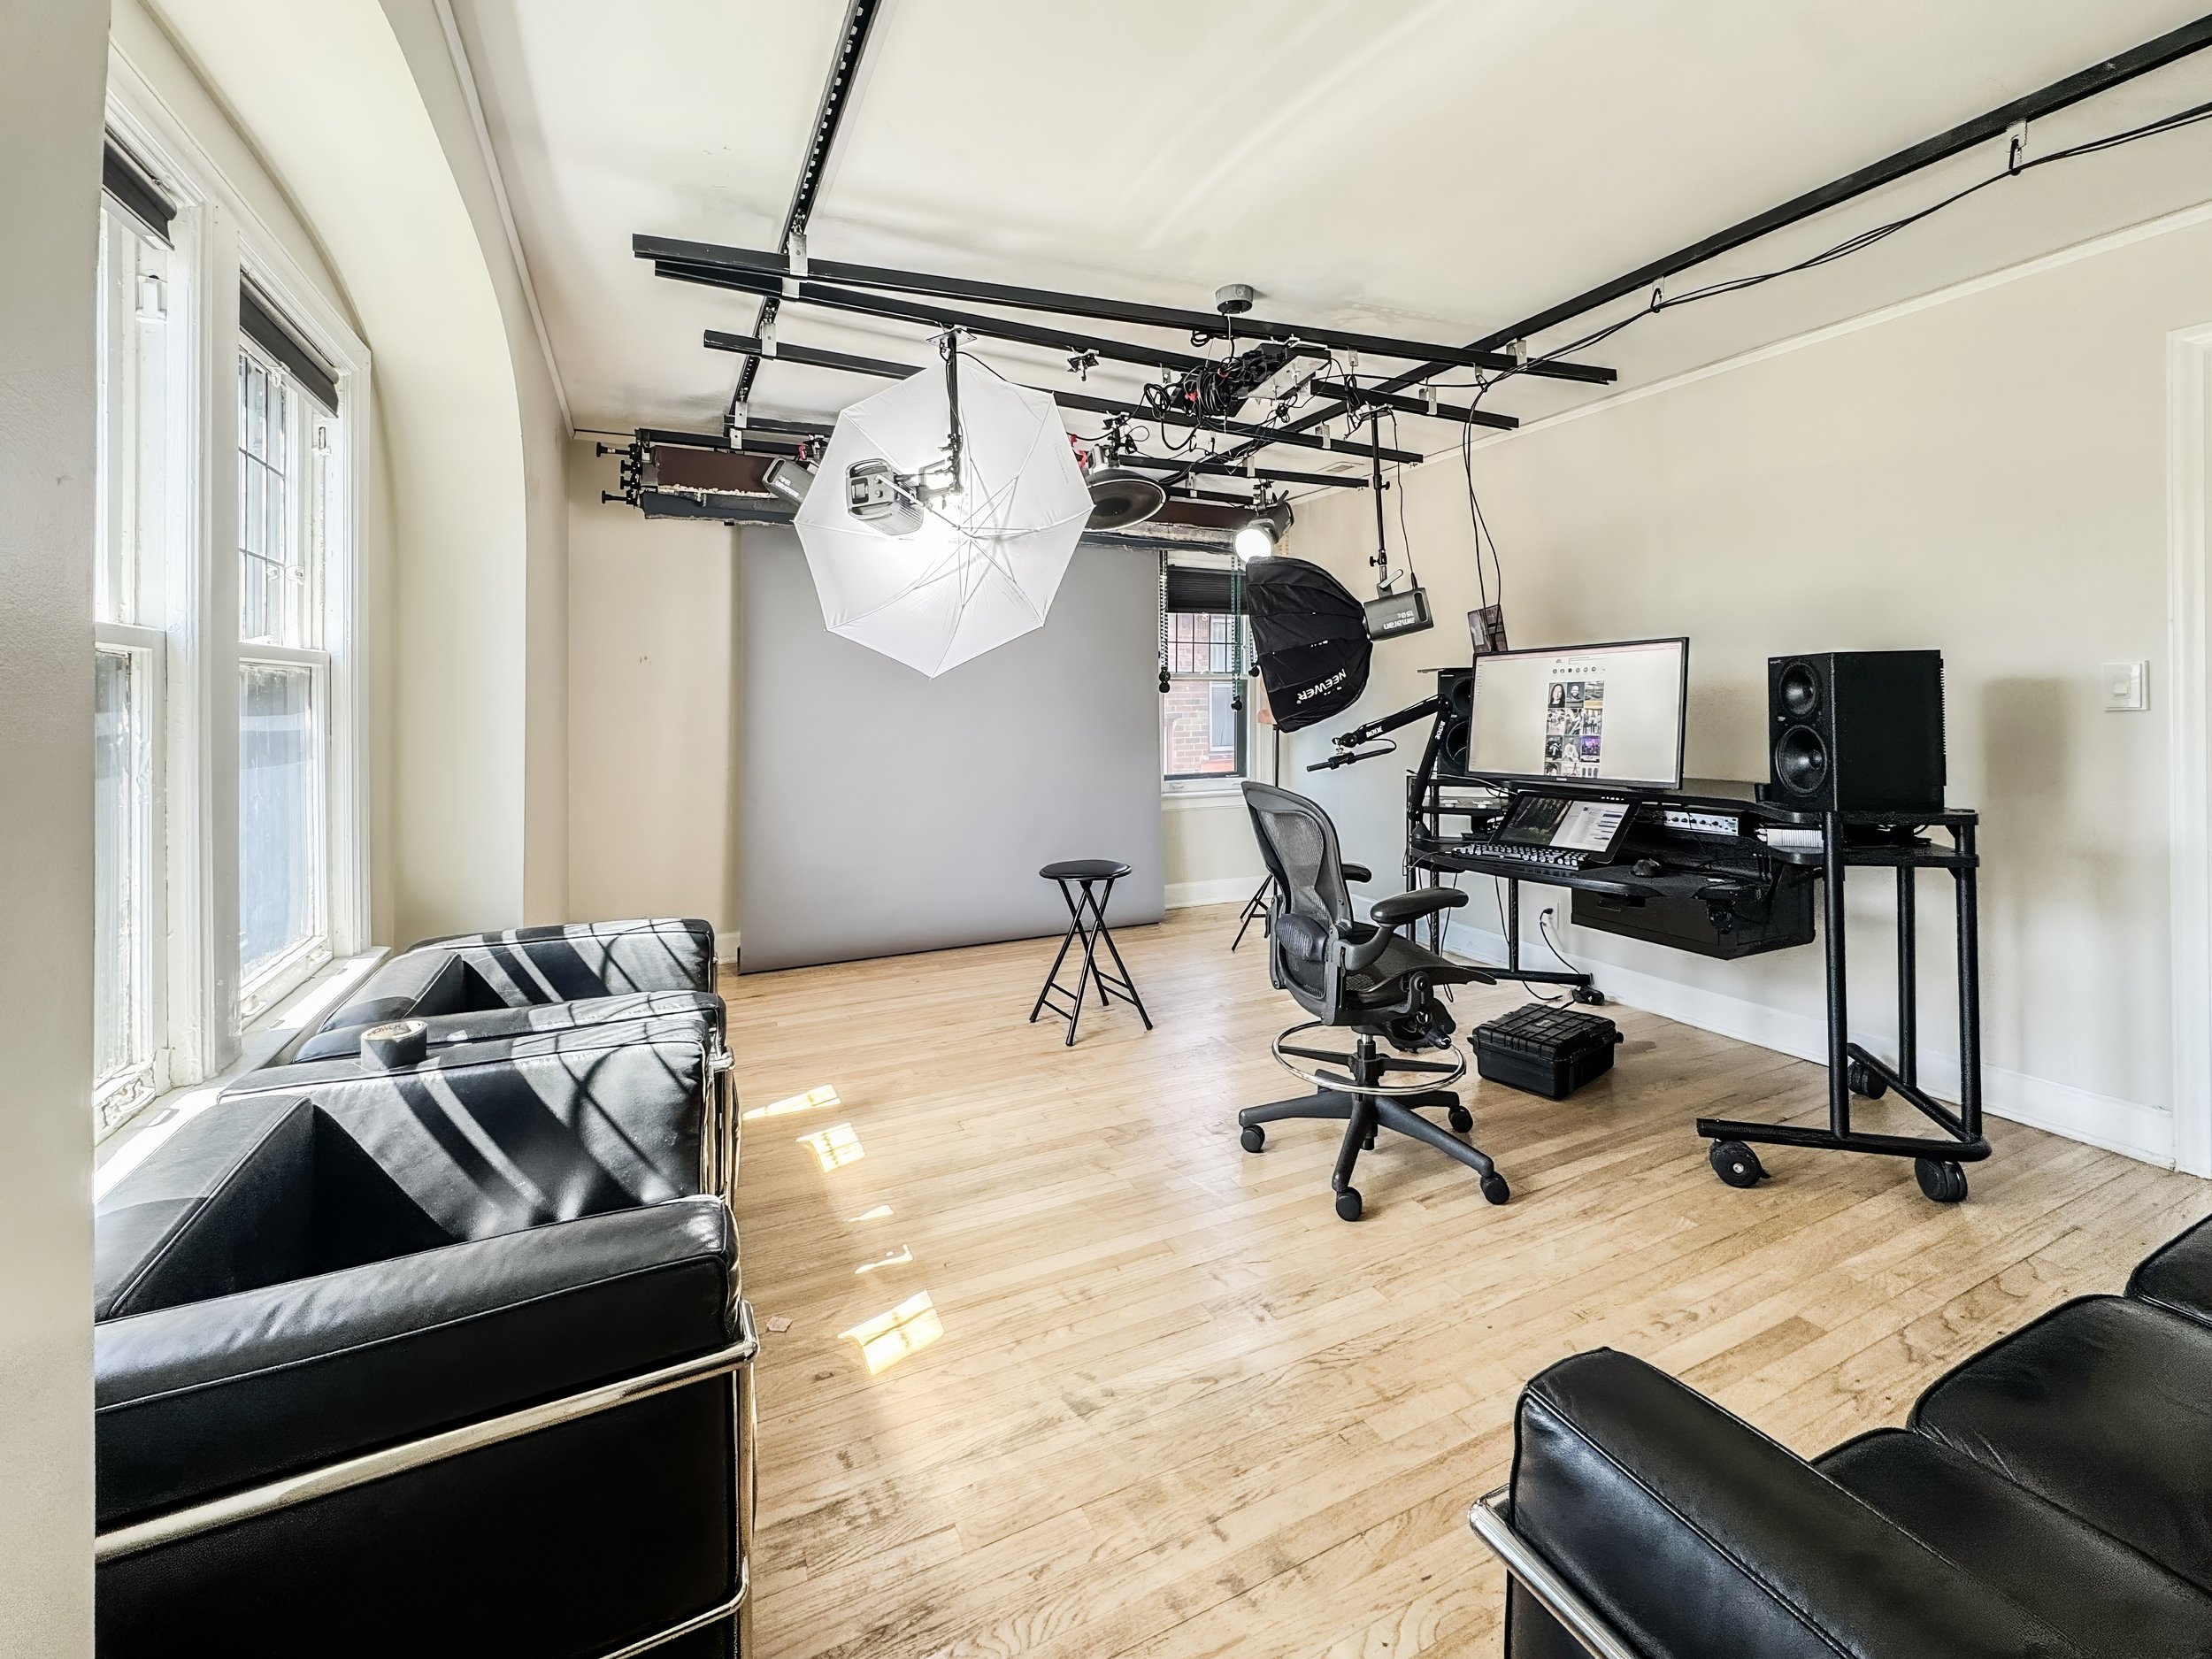
This post outlines how I built a moving-track overhead lighting grid for my photography studio.
This system lets you roll lights anywhere above a set for about one-tenth the price of a comparable Manfrotto Sky Track—and the layout can grow indefinitely by adding more channel and trolleys.
This system is built completely from components available at any home center like Home Depot or Lowes, and from Amazon.
Main Rails
The main rails are attached directly to the ceiling joists using standard construction screws. They were painted black using standard Rustoleum spray paint.
Superstrut 10 ft half-slotted channel – primary rails, painted flat-black after installation
#9 × 2 ½″ star-drive construction screws – mount channel directly to ceiling joists
Limit-stop wheels – keep moving rails from overrunning the track
Moving rails
Each moving rail is hung using a combination of trolley hangers and strut hangers, both of which are available on Amazon.
SKTREX strut hangers – bolt to fixed rails and hold the rolling rails
4-wheel heavy-duty trolleys – let each secondary rail glide end-to-end
Boom Arms
Boom arms are mounted to the 12-wheel trollies using 1/4-inch bolts and washers.
Light Fixtures
Aputure Amaran 300c - Used as a key, primarily with shoot-through umbrellas
Aputure Amaran 150c - Used as a fill with a Neewer 28” softbox
Aputure Amaran 150c - Usex as a pair of kicker or background lights
Aputure Amaran 60x - used for a hairlight with a 24 inch beauty dish
Cable management
Cables are managed using 2-wheel trollies and aluminum carabiners.
2-wheel trolley assemblies – ride the moving rails; each carries one boom arm
3″ aluminum carabiners – clip to 2-wheel trolleys for clean cable support
Assembly Outline
Fasten fixed rails: drive star-head construction screws through the strut into ceiling joists; paint rails flat black.
Add rolling hardware: bolt SKTREX hangers to the fixed rails and insert 4-wheel trolleys.
Mount secondary rails: thread each hanging bracket into a trolley so the entire rail rolls across the room.
Install stops: clamp limit-stop wheels to the parent track to define travel limits.
Attach booms: secure each Selens boom to a 2-wheel trolley with a single ¼-20 bolt and lock-nut.
Cable management: hook carabiners to the 2-wheel trolleys and run power cords through them.
Build time is about half a day with a drill and socket set; total cost lands well under 10 % of a commercial sky-track kit.
Control & Power
One wall switch: a single switched outlet powers the grid; flip it and every fixture comes online.
Sidus Link app: intensity, CCT, hue, and effects for each Amaran head are adjusted wirelessly from a phone—no DMX runs, no physical dimmers.
Infinite Expansion
Need more reach or capacity? Add another length of strut, drop two more 4-wheel trolleys, and bolt it on. Extra 2-wheel trolleys create new light positions in seconds, and every component is standard Unistrut hardware—readily available and budget-friendly.
With basic hand tools and off-the-shelf parts, you get a silent, floor-free lighting system that slides wherever the shot demands—at a fraction of the cost of pre-built solutions and with unlimited room to grow.