
How to Make a DIY Hand-Painted Backdrop for photography: Step-by-Step Guide

Creating a hand-painted backdrop is a fantastic way to add a personal touch to your photography. It’s an affordable and creative alternative to buying expensive, pre-made backdrops. Whether you’re a professional photographer or just starting out, a DIY backdrop can bring unique textures and colors to your photo sessions. In this guide, we’ll show you how to make a hand-painted backdrop using simple materials.
Why Create a DIY Hand-Painted Backdrop?
There are plenty of reasons to make your own backdrop:
1. Customization: You have complete control over the colors, textures, and patterns, allowing you to match the backdrop to your specific style or project.
2. Cost-Effective: DIY backdrops are often much cheaper than purchasing professionally made ones.
3. Creative Freedom: Experiment with different paint techniques to create a backdrop that’s one-of-a-kind.
Now, let’s dive into the materials you’ll need and the steps to create your custom backdrop!
How much does a hand-painted backdrop cost?
The cost of making my backdrop was about $150, or about 1/5 the price of buying one.
Materials Needed for a DIY Hand-Painted Backdrop
These are the exact materials I used in my build
• Interior latex paint - Go to the home center and select three colors. You will need one gallon of each
• Large brush for staining decks and a pole
• Plastic drop cloth to place underneath
• 2 inch EMT conduit x10 feet - Home Depot
• Wall mounted backdrop holder
• Weights for securiring corners. If you don’t have weights, buy bricks.
Step-by-Step Guide to Creating Your Hand-Painted Backdrop
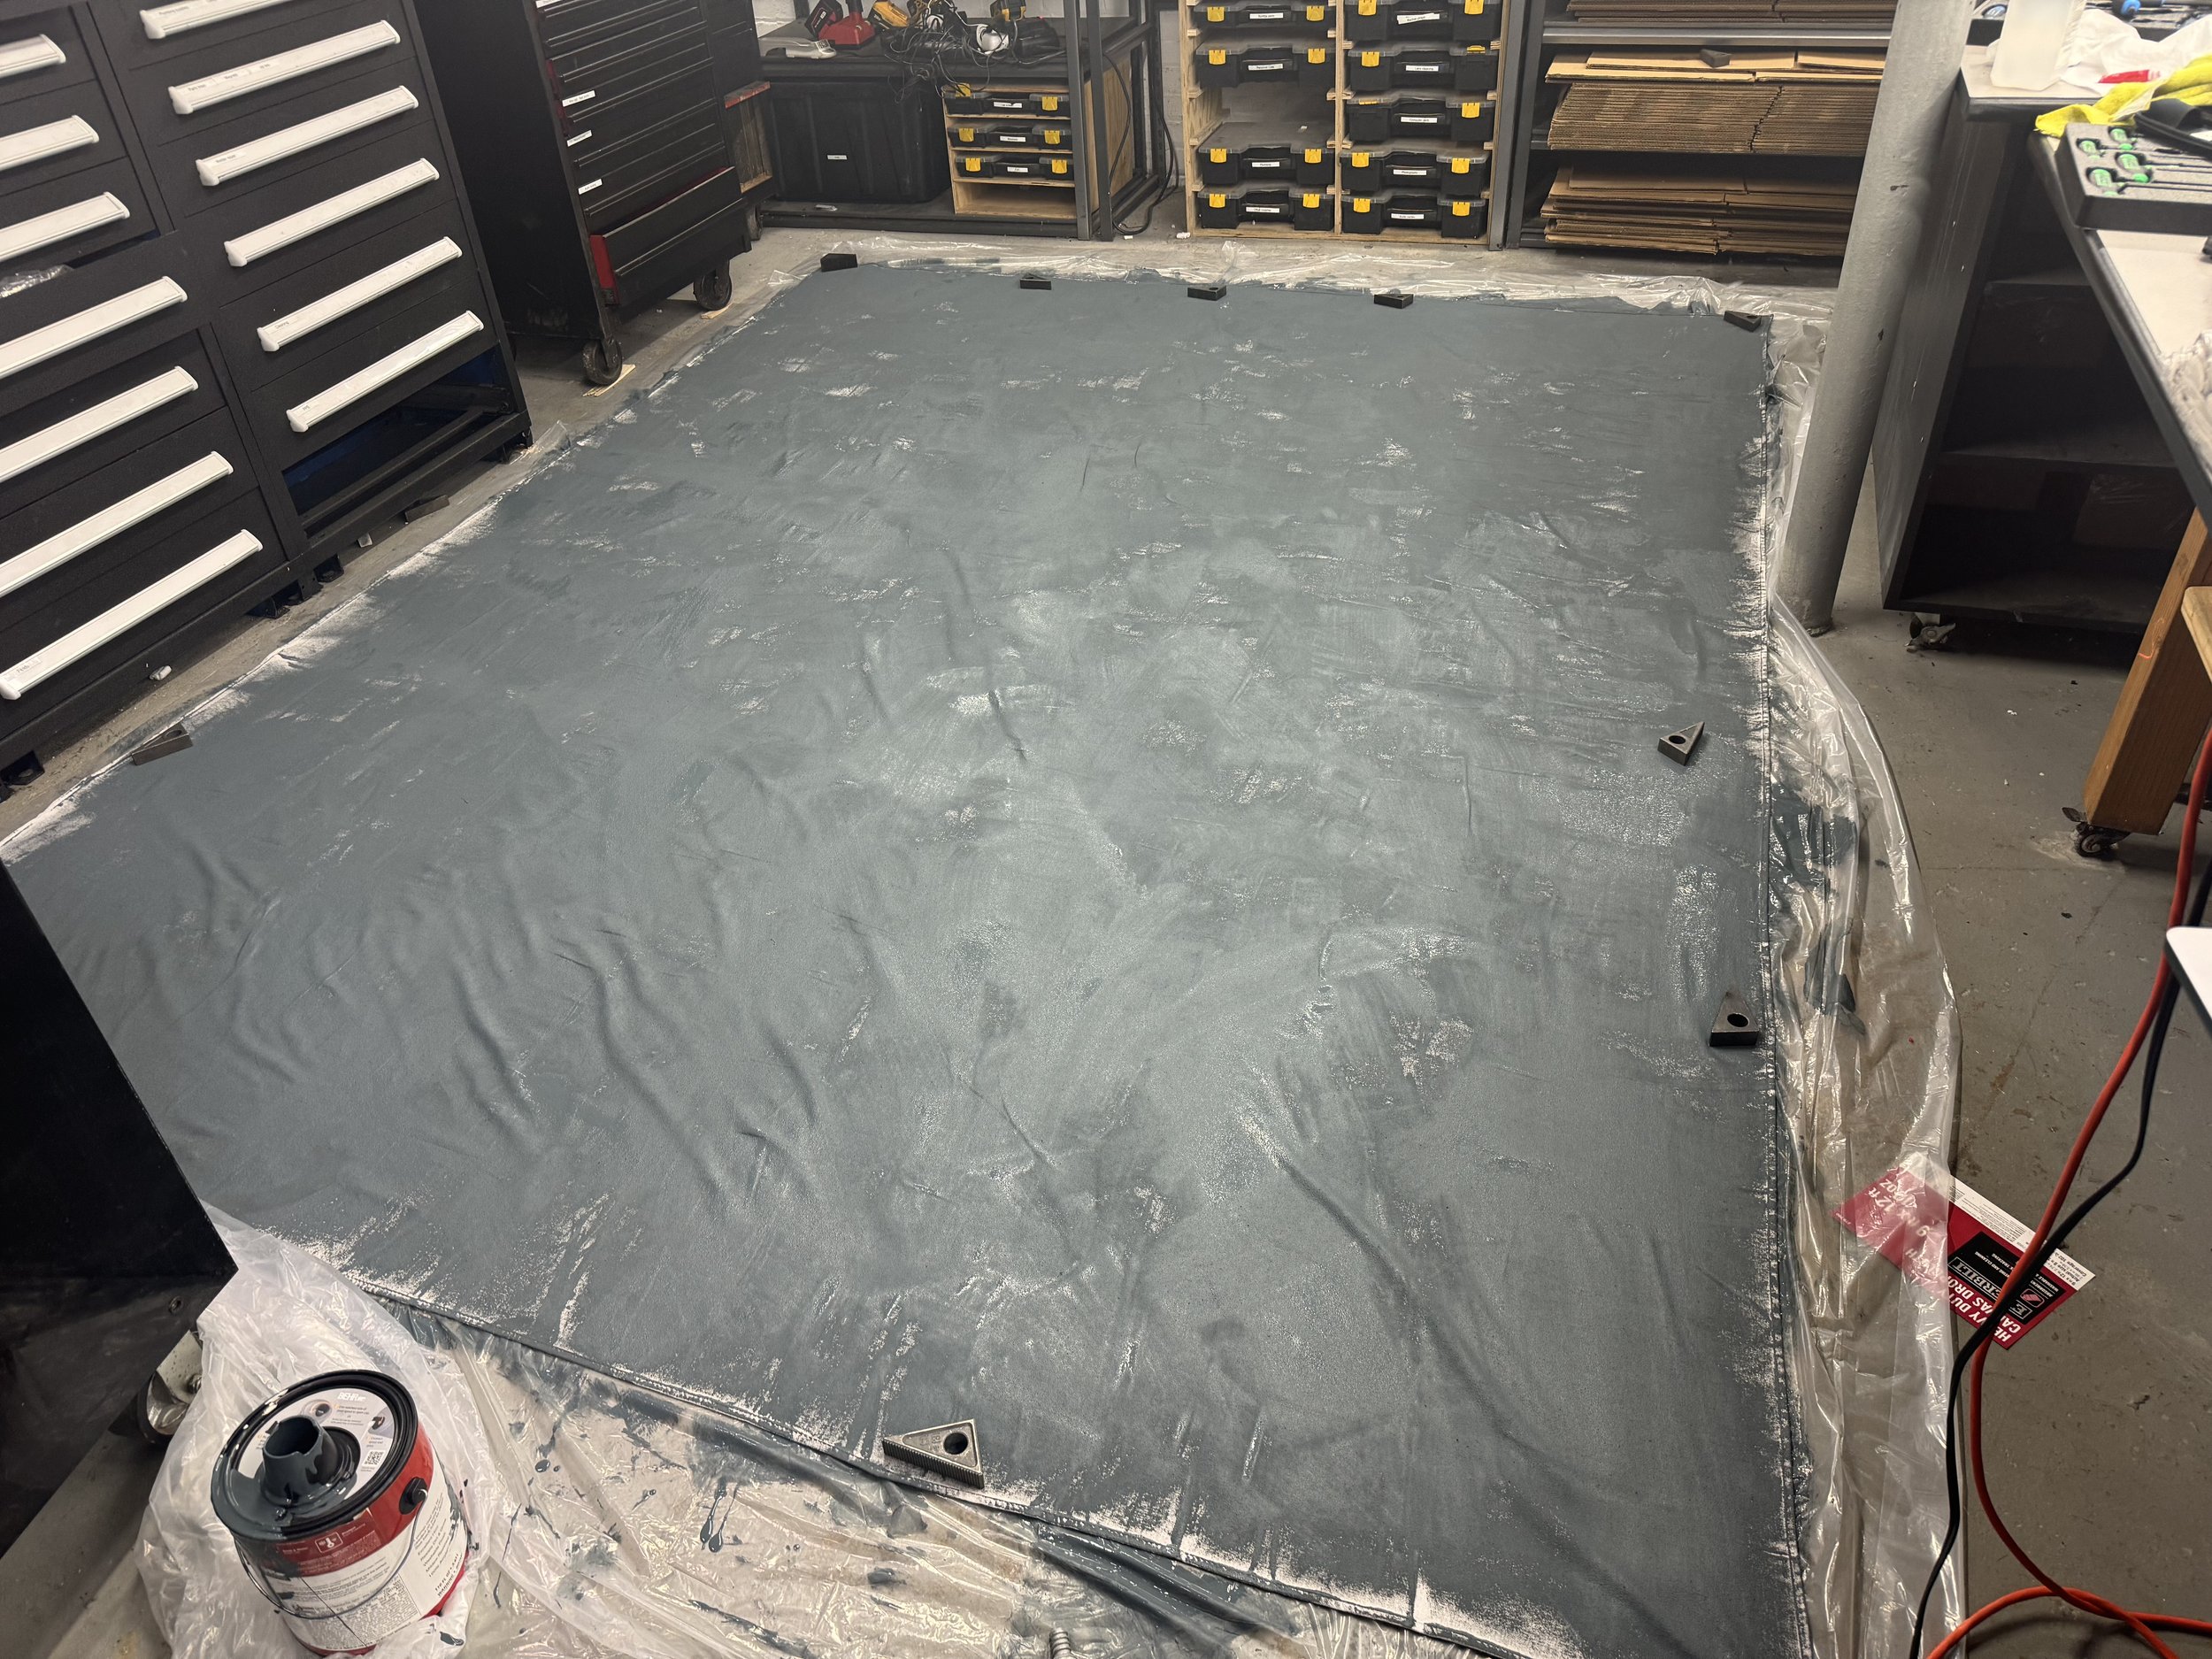
Step 1: Prepare Your Workspace
Lay down a protective drop cloth or plastic sheeting to keep your workspace clean. Secure the corners of the fabric with weights, stretching it as mush as possible.
Step 2: Iron the fabric
Ironing the backdrop took me about 30-40 minutes.

Ironing your backdrop is critical to success.
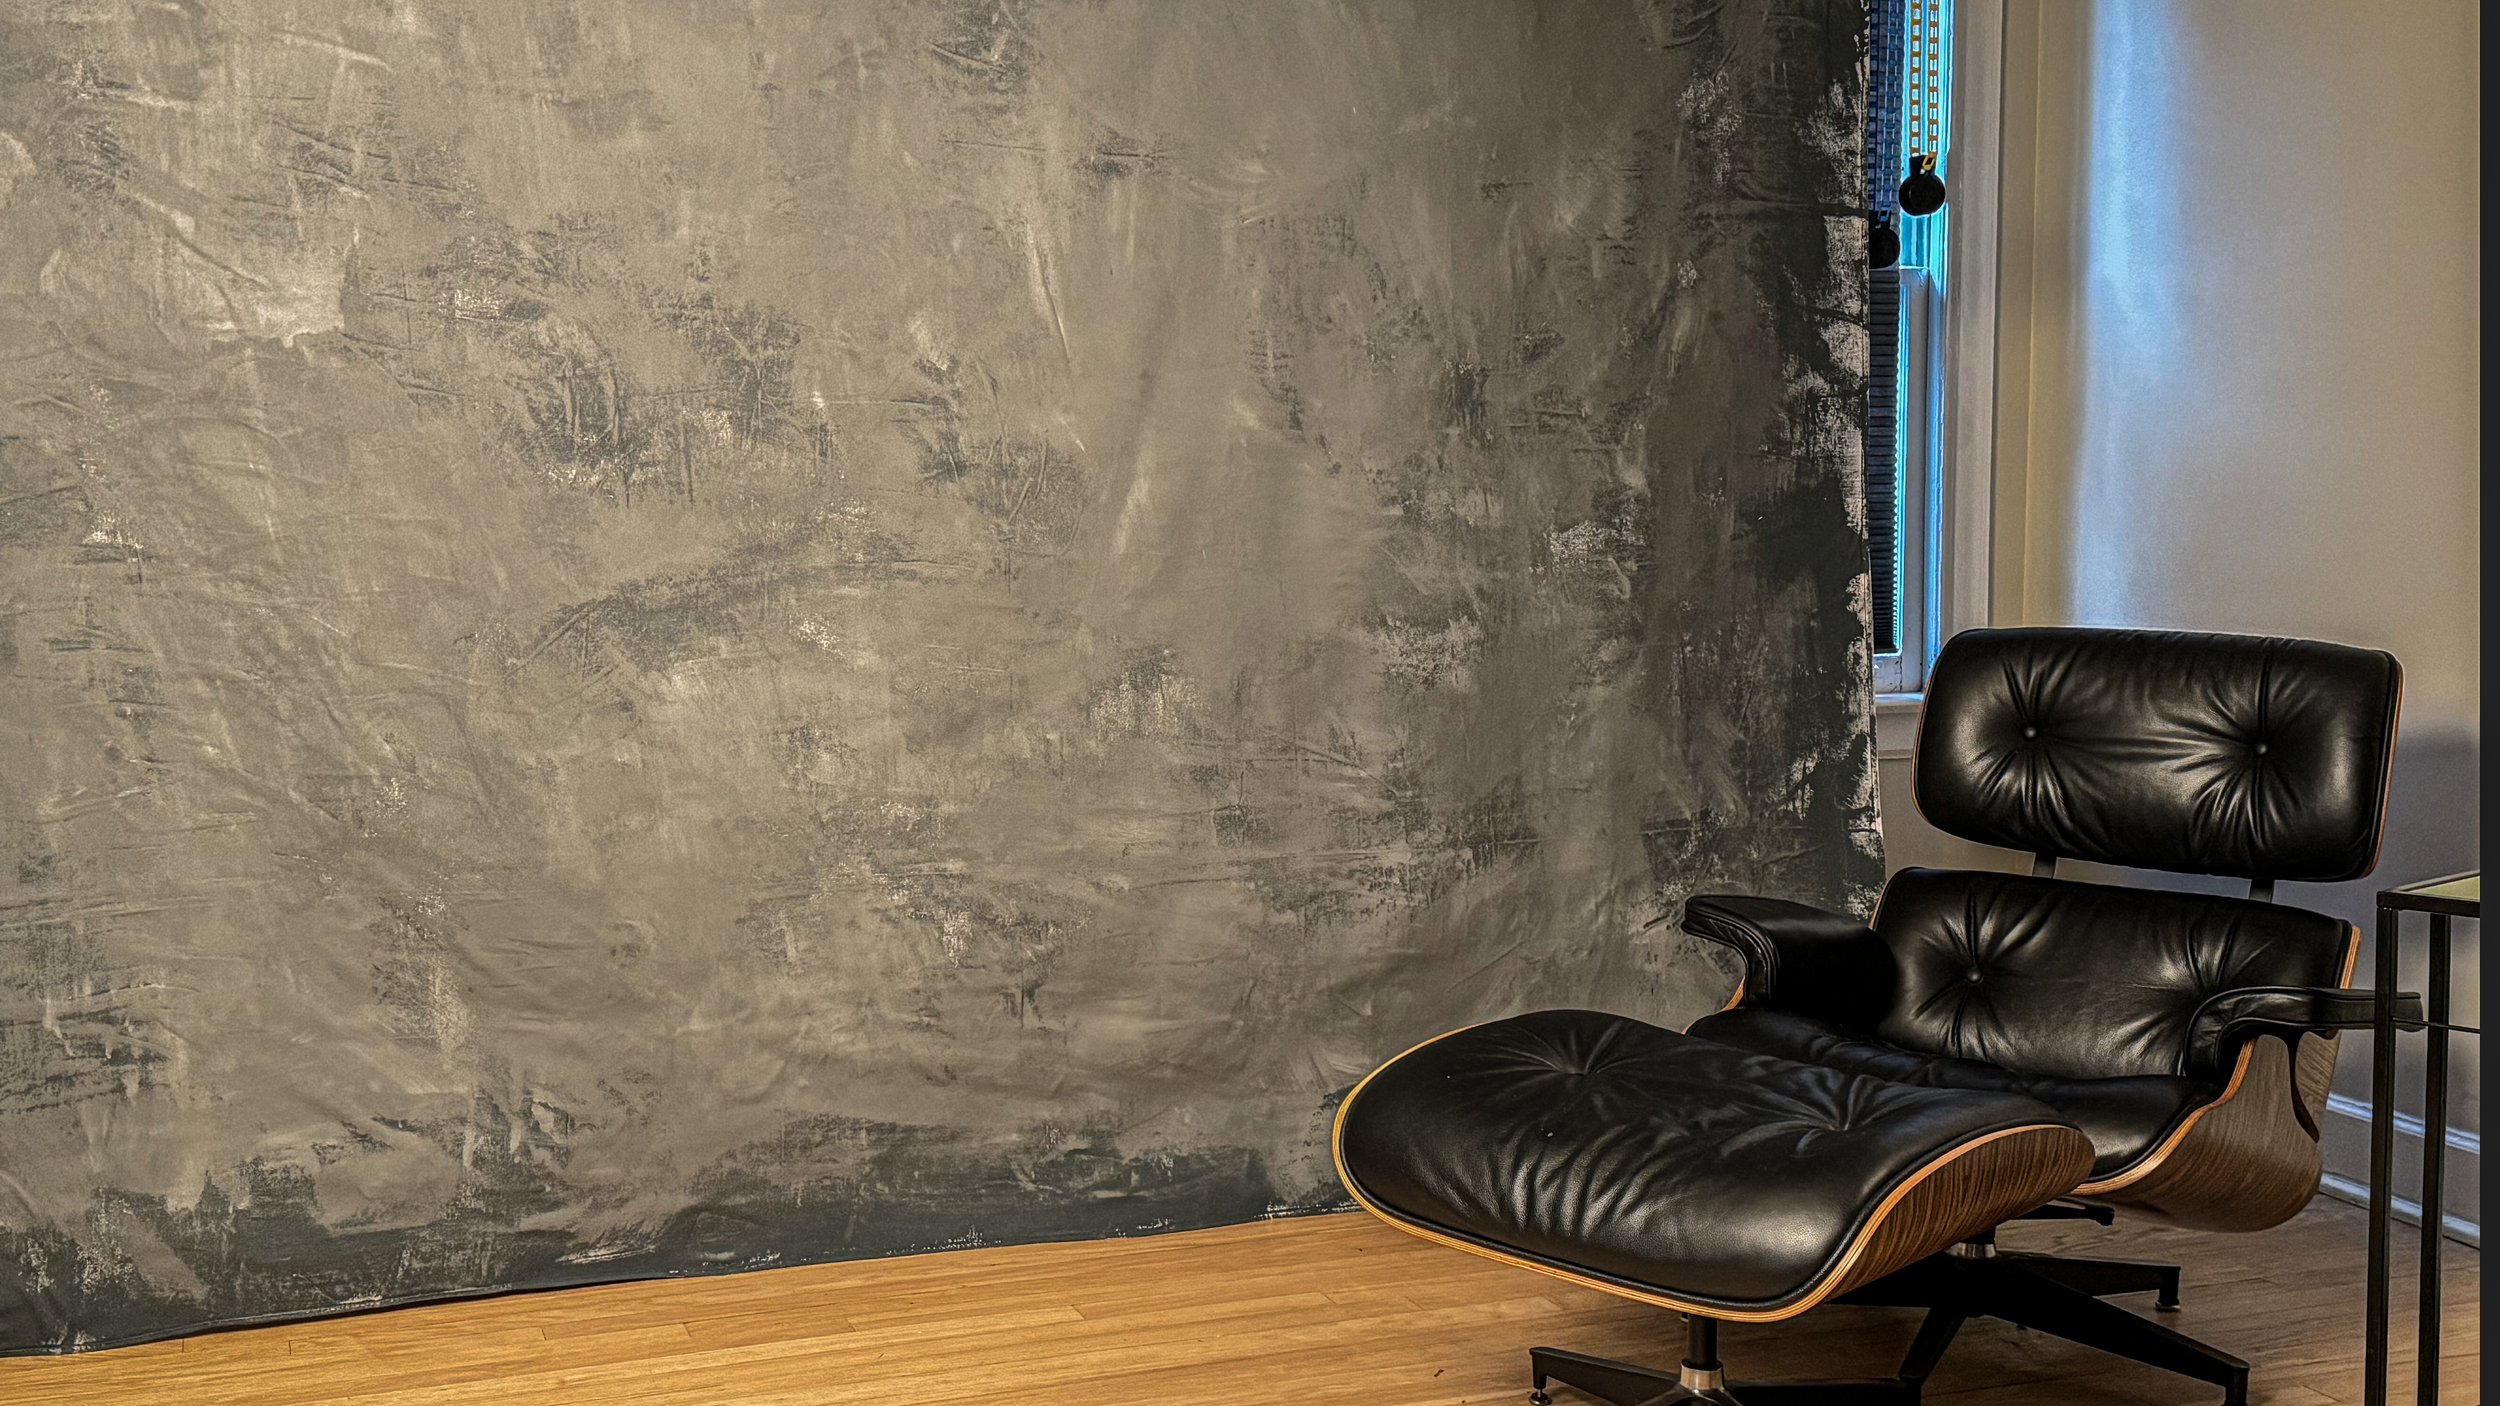
Step 3: Paint the base coat
I worked form one side of of the canvas to the other, dipping directly from the paint can, then blending it with the five inch paintbrush mounted to a pole. I started from lightest to darkest.
Step 4: Paint the second and third coats.
Wait 20 minutes between coats before applying the second and third coats. Remember, you don’t need full coverage on any of the coats, at they layer to give a textured effect.
Step 5: Let the Backdrop Dry Completely
I left the backdrop dry overnight before rolling it up
Step 6: Mount onto EMT conduit
Once the backdrop is try, you can mount it onto the EMT conduit with some packing tape, then roll it up completely. You will need to cut the conduit to length with an angle grinder beforehand
Step 7: Mount onto the backrop holder
You can mount your canvas backdrop just like a regular sheet of seamless.
Step 8: Rolling and unrolling
Painted canvas is far heavier than seamless backrop paper. For this reason, it will tend to unroll on the backdrop holder. It’s best to secure the roll with a clamp to prevent this.
Conclusion: Unleash Your Creativity with DIY Backdrops
Making a DIY hand-painted backdrop is a rewarding project that allows you to bring your creative vision to life. With a few materials and a little bit of time, you can create a stunning backdrop that adds a professional touch to your photography. Not only will you save money, but you’ll also have a backdrop that is uniquely yours.